
–
Computer Play
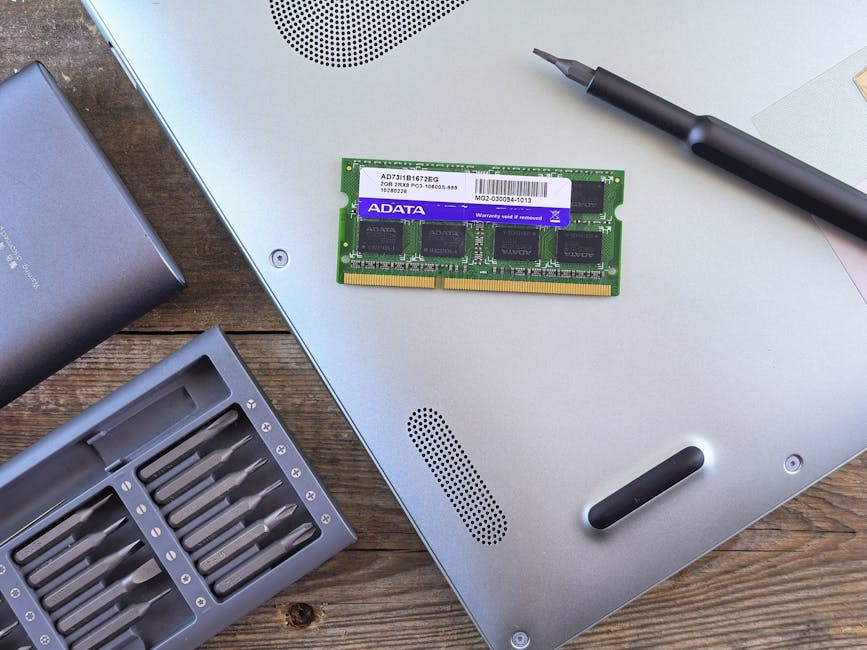
Even a Code-Illiterate Built It! Home Server Journey (5) — OpenClaw: One Week Honest Review
OpenClaw Is Trending. So I Tried It.
AI agents are having a moment. Among them, an open-source AI agent framework called OpenClaw has been making waves in developer communities. “Run an AI secretary on your own server,” “command anything via Telegram” — that’s the pitch.
So I tried it. Installed OpenClaw on the home server from Episode 1, connected it to a Telegram bot, and used it for about a week.
The verdict?
“Revolutionary? No. But a few things are genuinely useful.”

What Is OpenClaw, Briefly
OpenClaw is an open-source AI agent platform. Install it on your server, and AI doesn’t just chat — it actually executes tasks. It reads files, calls external APIs, and runs jobs automatically on a schedule. The biggest difference from ChatGPT is this “agency” — the ability to act, not just answer.
It integrates with messengers like Telegram and Slack, and you can extend functionality through a plugin system called “skills.” You can freely swap AI models — Gemini, Claude, GPT, local LLMs, whatever you want.
Installation is one Docker command. But the actual skill development and setup… I’ll get to that.
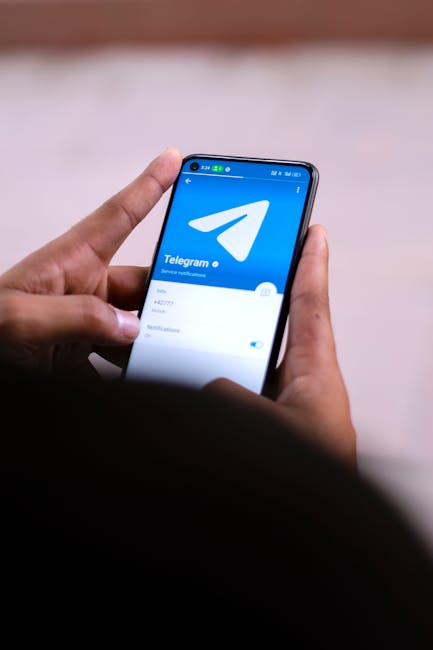
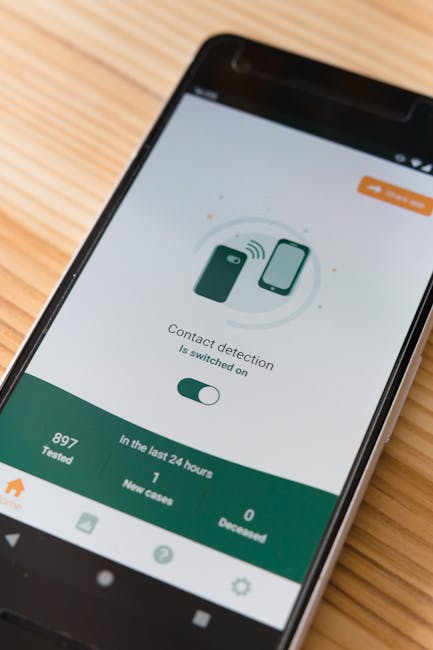
Connecting Telegram — Meet “Jolgae”
After installing OpenClaw, you connect it to a Telegram bot. Create one through BotFather, drop the token into OpenClaw’s config, done. That part’s easy.
The important part is the name. What do you call your AI assistant? After some thought — “Jolgae” (졸개).
Jolgae is a Korean word meaning “underling” or “lackey” — the lowest-ranking errand boy in the Joseon Dynasty military. Someone who just does what they’re told, no questions asked. Think about what an AI agent actually is. It’s fundamentally “a thing that does stuff when you tell it to.” No need for grandiose names like “Jarvis” or “Alexa.” Let’s be honest. It’s a lackey.
“Jolgae, what’s the weather?” “Jolgae, translate this.” — it just feels natural. Not some grand AI assistant, just an errand boy I boss around. Took five seconds to name it, but surprisingly satisfying.

Honestly, It Wasn’t Mind-Blowing
My expectations were high. “AI agent” sounds like science fiction. An AI secretary living on my server? Commands via Telegram?
But in practice… it’s not that different from texting ChatGPT. Ask a question, get an answer. Request a search, it searches. There were honest moments of “…is that it?”
The things developers rave about — the skill system architecture, model waterfall switching, API routing — technically elegant, sure. But as a regular user, “so what actually changes in my daily life?” matters more.
Opening the ChatGPT or Gemini app to ask a question versus texting Jolgae on Telegram — the difference isn’t dramatic. At least not at first.
But Then. Things Start Getting Convenient.
A few days in, I noticed something. “Hmm, I’d miss this if it were gone.”
It doesn’t dramatically change your life. But small conveniences stack up, and that stack gets surprisingly tall. Here are the features I found genuinely useful after a week.
1. Morning Briefing — No More Scrolling
Every morning at 7 AM, there’s a Telegram message waiting. Busan weather and air quality, exchange rates and gold prices, industry news I follow, AI tech trends, gaming news. Only topics I care about.
I used to open a news page on my commute and scroll through ads and clickbait until something interesting showed up. Now I don’t have to. AI reads the articles and sends 3-line summaries to Telegram. Two minutes on the subway and I’m caught up for the day.
Would I install OpenClaw just for this? That’s a stretch. But it’s the feature I use daily and enjoy most.
2. Voice Transcription — This Actually Saves Money
This was the surprise killer feature. Google Meet, Zoom, Teams, Webex — send Jolgae a meeting link and a bot joins the call, records it, and converts everything to text.
Whisper (open-source speech recognition AI) runs on the server and converts speech to text. Jolgae then summarizes the result, separating key points, action items, and decisions. Results auto-save to Notion too. When the meeting ends, the minutes are waiting in Telegram.
Cloud transcription services like Otter.ai run $20-30/month. This setup? $0. Everything processes on my server.
One realistic caveat though. Whisper is hardware-hungry. Running local Whisper on my server (Ryzen 7, 32GB RAM) with CPU only, a 1-hour audio takes over an hour to transcribe. Yes, slower than real-time. You wait as long as the recording — or longer. An NVIDIA GPU with CUDA would make it 5-10x faster, but my server only has an AMD integrated GPU (Radeon 780M). AMD doesn’t support Vulkan acceleration for this, so the GPU just sits there unused. CPU-only it is. You need at least 16GB RAM for the medium-quality model, and 32GB for comfortable large-model usage. On an 8GB machine, it’s practically unusable.
So I also use OpenAI’s Whisper API. Cloud processing makes the speed noticeably better. Still not snappy, but a lot more bearable. Free local vs paid API — pick depending on the situation. I’ll cover this feature in more detail in the next episode.
3. Weekend Outing Planner — My Wife Likes This One
Friday at 6 PM, “Weekend outing recommendations!” arrives on Telegram. It checks weekend weather, picks three seasonal courses near Busan. Each comes with the address, drive time, kid-friendliness rating, parking info, estimated cost, and a rainy-day backup.
Honestly, the recommendation quality isn’t always great. Sometimes it suggests odd places, or recommends spots I’ve already visited. But the time spent wondering “what do we do this weekend?” shrinks. Bad suggestion? Don’t go. Good one? Just go.
Sharing “how about here?” with my wife turns into a conversation starter. That’s way better than staring at each other asking “so… what should we do?”
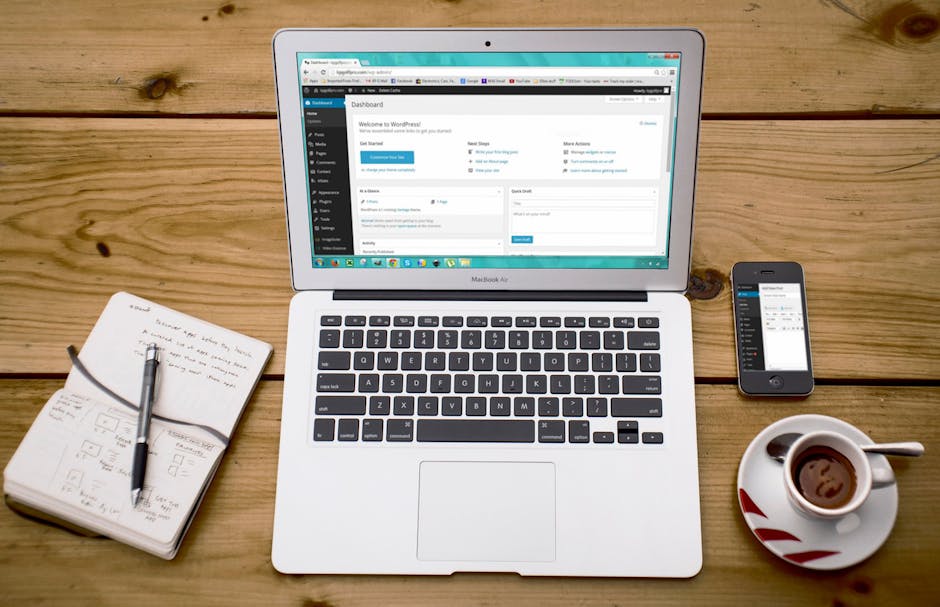
4. Auto Blog Publishing — 10 Minutes Per Post
This blog itself is proof. Give Jolgae a topic and it handles keyword research, writing, SEO meta tags, stock image insertion, and bilingual KO/EN publishing to WordPress. About 10 minutes per post.
Of course, AI-written content doesn’t go up unedited. There’s always something to fix. AI has never produced a 100% perfect post. But starting from a blank page versus starting from an 80% draft is night and day. I’ll dive deeper into the blog auto-publishing pipeline in the next episode.
Things That Fell Short
An honest review means covering the downsides too.
- For general chat, ChatGPT is just better. Faster responses, higher quality answers. Opening the ChatGPT app is often more convenient than texting Jolgae on Telegram.
- Setting up skills isn’t easy. Officially, “no code needed.” In reality, you end up having AI write code for you. A non-developer adding new skills alone isn’t realistic.
- It’s dumb sometimes. Misunderstands commands, sends wrong results, or errors out for no apparent reason. “AI agent” absolutely does not mean infallible.
- Responses can be slow. Simple chat is fast, but tasks involving web search can take 30 seconds to a minute. Frustrating when you’re in a hurry.
ChatGPT vs OpenClaw — Side by Side
| ChatGPT / Gemini App | OpenClaw (Self-Hosted) | |
|---|---|---|
| Chat Quality | High | Moderate (depends on model) |
| Response Speed | Fast | Moderate to slow |
| Scheduled Tasks (Cron) | No | Yes |
| Access Server Files | No | Yes |
| External API Integration | Limited | Unlimited |
| Telegram Integration | No | Built-in |
| Data Privacy | Cloud-stored | Your server only |
| Extensibility | GPTs (limited) | Skill system (unlimited) |
| Setup Difficulty | None | Docker required |
| Cost | $20+/month | API usage only |
Bottom line: ChatGPT wins overwhelmingly on chat quality and speed. But if you need automation, scheduled execution, and server integration, OpenClaw can do things ChatGPT simply can’t. Different tools for different jobs.
So, Worth Installing?
OpenClaw is a good fit if you:
- Already have a home server running Docker
- Need daily, repetitive information gathering (news briefings, price monitoring)
- Do frequent voice transcription (this genuinely saves cloud service fees)
- Want everything unified through one Telegram bot
You can skip it if you:
- Are happy with ChatGPT Plus or Gemini Advanced subscriptions
- Don’t have repetitive tasks worth automating
- Don’t have a server — phone only
It’s not a revolution. But once set up, daily conveniences quietly accumulate. Morning briefings, voice transcription, weekend recommendations — those three alone made the installation worthwhile for me.

Technical Details (For the Curious)
My Jolgae (OpenClaw agent) configuration for reference:
| Item | Configuration |
|---|---|
| AI Models | Gemini 2.5 Flash (primary) → Claude Haiku → GPT-4.1-mini → Ollama (local backup) |
| Installed Skills | 32 (briefing, transcription, blog, planner, monitoring, etc.) |
| Automated Tasks | 1 daily + 3 weekly + 2 monthly |
| Interface | Telegram bot |
| Server | Beelink SER9 MAX, AMD Ryzen 7, 32GB DDR5 |
| Monthly Cost | ~$4 electricity + API usage fees |
OpenClaw installation itself is one Docker command. But skill development and detailed configuration? I had AI (Claude Code) do it for me. Honestly, a non-developer doing it alone is tough. But having AI do it for you counts as a valid approach. That’s how things work in 2026.
Currently Installed Skills (32)
| Category | Skill | What It Does |
|---|---|---|
| Daily Automation | morning-briefing | Custom news briefing every morning |
| weekend-planner | Weekend outing course recommendations | |
| weekly-insight | International trends weekly digest | |
| Content | blog-factory | Auto blog writing + publishing |
| translate-blog | Multilingual blog translation | |
| image-gen | AI image generation | |
| Work Tools | meeting-transcribe | Voice file transcription + summary |
| ocr-bot | Extract text from images | |
| gold-briefing | Business news briefing | |
| Monitoring | rate-monitor | Telecom rate change detection |
| busan-culture | Busan culture/experience program watch | |
| power-monitor | Server power monitoring | |
| Knowledge Mgmt | notion-rag | Notion semantic search |
| local-rag | Local file semantic search | |
| second-brain | Personal knowledge management | |
| System | system-heal | Server self-healing |
| self-evolution | Agent self-learning | |
| Lifestyle | food-recommend | Restaurant recommendations |
| anniversary | Anniversary reminders | |
| Other | +13 more | n8n integration, decision helper, side hustle explorer, etc. |
Of these, only about 5-6 make a noticeable daily difference. The rest are “nice to have.” But those 5-6 showing up in Telegram every morning — that’s the whole point.
Next Episode Preview
The blog auto-publishing I briefly mentioned in this episode — next time, I go deep. How AI publishes a blog post in 10 minutes — from keyword research to bilingual KO/EN publishing, all broken down from a non-developer’s perspective.
EP.6 — AI Writes My Blog? Building an Auto-Publishing Pipeline.
Even a Code-Illiterate Built It! Home Server Journey (4) — Running AI Locally with Ollama

Running AI on My Own Server?
ChatGPT, Gemini, Claude… everyone uses cloud AI. But have you ever thought:
“If I run AI on my own computer, it’s free AND my data stays private?”
That’s exactly right. Running a local LLM (Large Language Model) means no subscription fees and zero data leaving your machine. Perfect privacy.
But reality is… a bit different. I installed AI on my SER9 MAX mini PC from Episode 1, and the honest verdict? “It works. But it’s slow.”
Ollama — The Local LLM Engine
Ollama is a tool that lets you run AI models on your own hardware. Sounds complicated? I had AI install it for me. A few terminal commands and done.
Once installed, one command — ollama run qwen3:14b — and the AI starts responding. The model downloads automatically, no configuration needed.
There are dozens of open-source models available: Llama, Qwen, Gemma, Mistral, DeepSeek… all free. Pick whichever fits your needs.
Open WebUI — ChatGPT Interface in Your Browser
Chatting in a terminal is honestly uncomfortable. So I installed Open WebUI — a program that gives you the exact same ChatGPT-like interface, running entirely on your server.
Again, AI handled the installation. One Docker container and it’s running.
The best part? My wife uses it too. Anyone on the same network can open a browser on their phone or tablet and start chatting. You can create separate accounts, so conversation history stays private for each person. With Tailscale from Episode 2, it’s accessible from anywhere.

Specs vs. Reality — This Is What Matters
The most important question in local AI is “Can my hardware actually handle it?” Here are my real-world numbers.
My Server Specs
| Component | Specification |
|---|---|
| CPU | AMD Ryzen 7 255 (8 cores, 16 threads) |
| RAM | DDR5 32GB |
| GPU | Integrated (AMD Radeon 780M) — effectively none |
| Storage | NVMe SSD 1TB |
| OS | Windows 11 + WSL2 (Linux) |
Real Benchmarks (Qwen3 14B Model)
| Metric | Value |
|---|---|
| Generation Speed | 5.5 tokens/sec |
| Simple Question Response | ~25 seconds |
| RAM Usage | ~10GB |
| Quantization | Q4_K_M (9.3GB file) |
What ChatGPT answers in 1 second takes my server 25 seconds. That’s roughly 5-10x slower in real usage. Watching characters appear one by one is… a patience test.
Why So Slow?
No dedicated GPU. AI inference is optimized for GPU computing, but my mini PC only has integrated graphics. I’ve confirmed that the AMD 780M iGPU can’t be used for AI acceleration under WSL2. Everything runs on CPU only — hence the speed.
With an NVIDIA GPU? The same model runs 5-10x faster. An RTX 4060 can push 30+ tokens/second. But you can’t put a discrete GPU in a mini PC — that’s desktop or gaming laptop territory.
RAM Determines Model Size
The most important spec for local AI is RAM. The entire model loads into memory.
| RAM | Model Size | Quality |
|---|---|---|
| 8GB | 7B (7 billion parameters) | Basic chat OK, struggles with complexity |
| 16GB | 14B (14 billion parameters) | Decent conversation, handles general tasks |
| 32GB | 14B + headroom / can try 30B | Comfortable 14B + other services running |
| 64GB+ | 70B (70 billion parameters) | Approaching ChatGPT quality |
7B vs 14B vs 70B — bigger means better. 7B handles simple chat but frequently hallucinates on complex questions. 14B is the minimum threshold where it feels “actually usable.” 70B jumps in quality but needs 40GB+ RAM.
That’s why I have 32GB. Running a 14B model while also keeping other Docker services (Immich, WordPress, n8n, etc.) alive requires the headroom.

So Is It Worth It?
Here’s my honest summary:
Worth it for:
- Simple conversations, translation, summarization — slow but delivers results
- Privacy-sensitive content — analyzing confidential work documents
- Offline use — on a plane, in areas with no internet
- Connecting AI to other apps — unlimited API calls, zero cost
Not worth it for:
- Coding, complex analysis — cloud AI is overwhelmingly better
- When you need fast responses — if you can’t wait 25 seconds
- When you need current information — local models don’t know anything after their training date
The core value of local AI is “free” and “privacy.” If you’re expecting performance, you’ll be disappointed. But if those two things matter to you, it’s absolutely worthwhile.
Next Episode Preview
So far we’ve covered building the server, remote access, photo backup, and local AI. Next up is the piece that ties everything together — an AI agent and Telegram bot. Send a message on Telegram, and AI handles the rest. Building your own digital assistant.
EP.5 — AI Agent + Telegram: Putting a Secretary on Your Server. Stay tuned.
Even a Code-Illiterate Built It\! Home Server Journey (3) — Replacing Google Photos with Immich 📸🏠

In Part 3, we set up a blog. Now it’s time for something actually useful.
Photo backup.
Google Photos: $2/month. iCloud: $1/month. Doesn’t sound like much, right? But what if you could do the same thing on your own server, for free, with unlimited storage?
Here’s the punchline: after setting up Immich on my home server, I cancelled my Google Photos subscription. Over 35,000 photos are now backed up automatically, and I can access them from anywhere thanks to Tailscale. What did I actually do? I told AI to set it up. That’s it.

Why I Left Google Photos
Google Photos is great. AI search, automatic albums, the whole deal. But here’s the thing:
- 15GB free runs out fast. Take photos for three months and you’re done.
- Paid plans never end. 100GB, then 200GB, then 2TB… it’s a subscription for life.
- Your photos live on someone else’s server. What if Google changes their policy? What if they shut it down?
iCloud is the same story. I was paying for 50GB just for iPhone backup. Another monthly charge that never stops.
“I have a server at home. Why am I paying someone else to store my photos?” Once you think that, you’re already halfway there.
What Is Immich?
Immich is basically a self-hosted Google Photos.
- 📱 Mobile app — automatic backup from Android and iOS
- 🔍 AI search — search “beach” or “cat” and it just works
- 🗺️ Map view — see where every photo was taken on a world map
- 👥 Face recognition — automatically groups people
- 📂 Albums — shared albums, timeline, everything
- 🔒 Your server — data stays in your home
It does almost everything Google Photos does. It’s free, open-source, and the only storage limit is your hard drive.
Installation: One Docker Compose File
Remember the Docker setup from Part 1? We just add on top of it.
# docker-compose.yml (essentials)
services:
  immich-server:
    image: ghcr.io/immich-app/immich-server:release
    ports:
      - "2283:2283"
    volumes:
      - ./upload:/usr/src/app/upload
    environment:
      - DB_PASSWORD=your_secure_password_here
      - REDIS_HOSTNAME=redis

  immich-machine-learning:
    image: ghcr.io/immich-app/immich-machine-learning:release

  redis:
    image: redis:7-alpine

  database:
    image: tensorchord/pgvecto-rs:pg16-v0.2.1
I told Claude “install Immich” and it created this file and ran docker compose up -d for me. I just watched.
Once it’s running, go to http://server-ip:2283, create an admin account, and you’re ready.
Auto-Backup from Your Phone
- Install Immich from Play Store (or App Store for iPhone)
- Enter your server address:
http://192.168.xxx.xxx:2283– Want access outside your home? Use your Tailscale IP (see Part 2!)
- Log in → Enable auto backup
- Done.
That’s literally it. Every photo you take now automatically goes to your home server.
I uploaded over 35,000 photos from my Galaxy S25 Ultra. How long did it take? About 3-4 days. But honestly, I didn’t even notice. I installed the app, turned on backup, and just lived my life. Went to work, ate, slept — and a few days later I opened the app and everything was there. That’s the beauty of it. Set it and forget it.
iPhone Users: You’re Covered Too
Same exact process:
- Install Immich from App Store
- Enter server address + log in
- Auto backup ON
For existing photos stuck in iCloud:
- Mac Photos app → Settings → “Download Originals to this Mac”
- Wait for everything to download (could be dozens of GB)
- Use
immich-goto bulk upload to your server
Google Photos works the same way. Export via Google Takeout → upload with immich-go. Duplicates are automatically filtered out. Even if the same photo exists in both Google and iCloud, only one copy ends up on your server.
Access Your Photos From Anywhere
Remember the Tailscale setup from Part 2? This is where it pays off.
Set your Immich app’s server address to your Tailscale IP (100.xx.xx.xx:2283), and you can access your photos from a cafe, from a business trip, from another country. It’s a VPN, so security isn’t a concern either.
AI Features: No Reason to Miss Google Photos
Immich comes with a built-in Machine Learning server. It runs automatically after installation.
Photo Search
Type “food” in the search bar and only food photos show up. “Beach”, “mountain”, “car” — it all works. Same AI search as Google Photos, but running on your own server.
Face Recognition
It automatically detects and groups faces. Tag someone’s name once, and you can browse all their photos in one place.
Map View
Photos with GPS data appear as pins on a world map. Perfect for “where did I take that photo last year?”
How Much Do You Actually Save?
Let’s do the math.
| Service | Monthly | Yearly |
|---|---|---|
| Google Photos 100GB | $2 | $24 |
| iCloud 50GB | $1 | $12 |
| Total | $3 | $36 |
| Immich (self-hosted) | $0 | $0 |
What about electricity? The SER9 MAX has a 54W TDP. Running 24/7 costs roughly $1.50/month in electricity. But that’s shared across all services — blog, AI assistant, local LLM, and more. The photo backup cost is effectively zero.
As long as you have hard drive space, it’s unlimited backup. Add a 1TB SSD and you’re set for a decade.
The Honest Downsides
Let’s be real about the cons:
- Server down = no access. During power outages or reboots, you can’t reach your photos. The app does cache recent ones for offline viewing though.
- You need backup for your backup. If your SSD dies, your photos are gone. External drive or NAS for redundancy is strongly recommended.
- Initial upload takes time. 35,000 photos took 3-4 days for me. But it runs in the background — just forget about it and check back later. One day you’ll open the app and it’s all done.
- Shared albums are limited. The “share a link with anyone” feature isn’t as polished as Google Photos yet.
But if you believe “my photos should stay on my server”, these trade-offs are worth it.
What’s Next
Photos backed up on our server. Blog is live. Remote access works. Now it’s time to give this server a brain.
In the next part:
- OpenClaw + Telegram — putting an AI assistant on the server and chatting with it via Telegram
- A morning briefing bot that sends weather, news, and schedule summaries every day
- An AI that writes blog posts, generates images, and even codes — my personal AI minion
Stay tuned for the story of how a guy who can’t write a single line of code built his own AI assistant.
This post was written by AI (Claude Code) and reviewed by a code-illiterate human. 🤖✨
[Computer Play] Even a Code-Illiterate Built It! Home Server Journey (2) — Access Your Server From Anywhere with Tailscale
In Part 1, I set up a Beelink SER9 MAX with WSL2 and Docker, building the backbone of my home server. With a mini PC running a server environment, I was ready to host anything.
But there was one problem.
“If I can only access it at home… isn’t it just an external hard drive?”
The real value of a home server begins when you can access it from anywhere. During the day I work at the office, and when I get home, there’s never enough time to sit in front of the computer. Days are packed. Commute time, lunch breaks, quick moments between tasks — I needed to be able to check and manage my server from my smartphone during these gaps.
So Part 2 is all about making the home server accessible from outside. And once again, I didn’t type a single line of code. I just told Claude Code, “Make it so I can access my server remotely.”

Remote Access Options for a Home Server
There are roughly three ways to access a home server from outside.
The first is port forwarding. You go into your router settings and open ports. The moment questions like “TCP or UDP?” come up, someone like me — a complete non-coder — is already lost. Plus, there are security risks, and if your home IP changes, you lose access.
The second is setting up your own VPN server — installing something like WireGuard or OpenVPN. Great if you have networking knowledge, but the setup is complex and requires certificate management. Mountain after mountain for a non-coder.
The third is Tailscale. And naturally, that’s what I chose.
What is Tailscale? — The VPN That Just Works
Tailscale, in one sentence: “Install it, log in, and you’re done.”
Traditional VPNs require setting up servers, creating certificates, configuring firewalls, setting up clients… the list never ends. Tailscale eliminates all of that. Install the app, log in with your Google or Microsoft account, and your devices automatically connect to each other securely.
Technically, it’s a mesh network built on top of WireGuard, a modern VPN protocol. But honestly, I don’t know exactly what that means. What matters is:
- Free for personal use — up to 100 devices
- 30-second install, almost nothing to configure — no networking knowledge needed
- Direct device-to-device connections — fast because there’s no middleman server
- Works on every platform — Windows, Linux, macOS, iOS, Android
The “nothing to configure” part is key. For non-developers like me, fewer settings means a better tool.
Installing Tailscale — Without Writing a Single Line of Code
My home server runs Docker on WSL2 inside Windows 11. Tailscale gets installed on the Windows side.
Installing Tailscale on the PC
I told Claude Code, “Install Tailscale for me,” and followed its instructions:
- Download the Windows version from the official Tailscale website
- Run the installer — Next, Next, Done
- A Tailscale icon appears in the system tray
- Click the icon → Log in → Sign in with Google
That’s it. The moment you log in, your server gets a dedicated Tailscale IP address. This IP is permanent — it doesn’t change even if your home internet IP changes. With this IP, you can access your server from anywhere.
What About WSL2 and Docker?
I was worried about this, but the answer is simple: you don’t need to do anything extra. Docker containers running inside WSL2 share Windows’ network, so installing Tailscale on Windows automatically makes all WSL2 services accessible.
For example, my WordPress runs as a Docker container, and accessing it via the Tailscale IP just works. Same for Immich (photo backup), Open WebUI (AI chat), and everything else.
I asked Claude Code, “Does this work with WSL2?” It said, “Install on Windows and WSL2 works too.” And it did. I didn’t need to understand why.
Accessing from a Smartphone — The Magical Moment
This is where it gets real.
The biggest reason I installed Tailscale was smartphone access. Working at the office all day, then coming home to household responsibilities — there’s surprisingly little time to sit at a computer. During lunch breaks, on the subway home, lying on the couch for a few minutes — I wanted to check my server during these in-between moments.
The setup is remarkably simple:
- Install the Tailscale app on your smartphone
- Log in with the same account you used on your PC
- Turn on the VPN connection
- Type the Tailscale IP in your browser
That’s it. During lunch at work, I check photos on Immich, send commands to my AI assistant via Telegram, and review my blog on WordPress admin — all from my phone.
The speed is surprisingly good too. Since it’s WireGuard-based, there’s none of the sluggishness you’d expect from a typical VPN. It feels like you’re on the same WiFi network.
For a busy professional with no time to sit at a computer, this is a game changer. The home server transforms from “something I use only at home” to “my personal cloud, always in my pocket.”
Tailscale Funnel — Opening Your Server to the World
Everything so far has been about connecting “my own devices.” But what about services that anyone should be able to access, like a blog?
Tailscale has a feature called Funnel. It exposes a specific service on your server to the internet, complete with an automatically assigned domain and HTTPS certificate.
Setting Up Funnel — Claude Code Did This Too
I told Claude Code, “Make my WordPress blog visible to the outside world.” Claude Code ran the necessary commands, and the result:
- Tailscale automatically assigned a domain
- An HTTPS certificate was automatically issued (Let’s Encrypt)
- External traffic was routed to my WordPress server
No need to buy a domain. No need to manually renew certificates. Tailscale handles everything.
This is exactly how you’re reading this blog right now. This post is served from the WordPress instance on my mini PC at home, exposed to the internet through Tailscale Funnel. No separate cloud server. No hosting service. Directly from the mini PC on my desk.
Funnel’s Limitations
It’s not perfect, of course:
- The domain is fixed as
*.ts.net— custom domains aren’t supported - Speed depends on your home internet’s upload bandwidth — not suitable for heavy traffic
- Only certain ports are available
But for a personal blog or small project, it’s more than enough. Being able to run a blog directly from your own server without cloud hosting — that’s the beauty of a home server.
The Non-Coder’s Secret: I Just Said “Do It”
I keep emphasizing this throughout the article, but I didn’t type a single line of code during any of this.
Installing Tailscale? Claude Code told me to “download and install this,” and I just clicked with my mouse. Setting up Funnel? Claude Code ran the commands itself. Verifying WSL2 compatibility? Claude Code said “it just works,” and it did.
I did exactly two things:
- Told Claude Code “do this for me”
- Clicked “Next” on the installation screens
This is how a non-coder runs a home server. Not by learning technology, but by delegating to an AI that knows technology. “Install Tailscale,” “Make it accessible remotely,” “Expose my blog to the public” — say it in plain language, and the AI handles the rest.
You might think, “But shouldn’t I at least understand the basics?” Honestly — no, you don’t have to. I still don’t know the difference between TCP and UDP. I’m not entirely sure what port forwarding actually does. But my home server is accessible from my smartphone anywhere in the world, and my blog is live on the internet.
What matters isn’t technical knowledge. It’s the will to make it happen. And in 2026, if you have that will, AI takes care of everything else.

What My Home Server Can Do Now
With hardware and Docker from Part 1, and Tailscale remote access from Part 2, here’s what my mini PC home server currently handles:
- Access from anywhere — office, café, subway, anywhere via smartphone
- Blog hosting — WordPress exposed to the internet via Funnel
- Photo/video backup — Immich as a self-hosted Google Photos replacement
- AI assistant — commanding an AI agent via Telegram
- Local AI — running LLMs directly on my server with Ollama
All of this runs on a single mini PC, and thanks to Tailscale, it’s always within reach. And everything was set up not by me, but by Claude Code. I just pointed the direction.
Coming Up Next
In Part 3, I’ll cover installing WordPress with Docker and building a blog. Setting up a bilingual (Korean + English) blog, and building a system where AI writes and publishes posts automatically — the non-coder’s home server journey continues.
All technical work in this series was performed by Claude Code (AI). The author (a non-coder) said “do it” and reviewed the results.
[Computer Play] Even a Code-Illiterate Built It! My Home Server Journey (1) – Starting with SER9 MAX, Windows 11, WSL2, and Docker 💻🚀 (feat. Claude & Claude Code)

[Computer Play] Even a Code-Illiterate Built It! My Home Server Journey (1) – Starting with SER9 MAX, Windows 11, WSL2, and Docker 💻🚀 (feat. Claude & Claude Code)
Hello, I’m Toaster! 🙋♂️ Today, I’d like to share the first story of an exciting project I embarked on: building my own home server. To be honest, I’m completely illiterate when it comes to code or computers. Yet, driven by growing costs of cloud services and concerns about my data sovereignty, I decided to create ‘my own playground.’ The journey began with a mini PC, the Beelink SER9 MAX. A special highlight is that this entire journey started with Claude, and the installation process was seamlessly handled by Claude Code!
1. Why Did I Want to Build a Home Server? And Why SER9 MAX? ✨
Initially, I used cloud servers. However, as time went on, the monthly costs became a burden, and I felt a vague unease about my precious data being stored somewhere else. So, I decided to ‘manage a server directly with my own hands.’ I dreamed of a digital playground operated in my own space, under my own rules. 🏰
I spent a lot of time considering which hardware to choose for building a home server. After comparing several mini PCs, the Beelink SER9 MAX caught my eye. 10 Gigabit Ethernet, dual M.2 NVMe slots, DDR5 memory, and an efficient AMD Ryzen 7 H255 processor! It boasted incredible specs for its small size. I vividly remember the excitement of ordering it from Amazon and waiting for its arrival. 📦 Throughout this entire process of exploration and decision-making, Claude provided invaluable assistance with various information searches and comparative analyses.
2. Is Windows 11 Suitable as a Home Server OS? 🤔
When I received the SER9 MAX, I found that Windows 11 was pre-installed. Typically, when people think of a home server, Linux often comes to mind, but I’m familiar with the Windows environment, and installing a new Linux server OS right away seemed cumbersome. So, I decided to use Windows 11 as is.
The advantages were clear. The familiar UI/UX made initial setup incredibly convenient, and its compatibility with various Windows software was excellent. For purposes like a media server or simple file sharing, it was quite appealing. However, there were also clear drawbacks. Compared to Linux-based server operating systems, Windows generally consumes more system resources like CPU and RAM, meaning that 24/7 stable operation requires more attention. The absence of advanced features like Remote Desktop Server and Hyper-V in Windows 11 Home was also a downside.
3. A Small Linux World Within Windows: My WSL2 Installation Journey 🐧
I learned that `WSL2 (Windows Subsystem for Linux 2)` was essential for installing `Docker` on my home server. This is because `Docker Desktop` uses the `WSL2` backend to run Linux-based containers on Windows. At first, I was worried it might be complicated, but I entrusted the installation to Claude Code, and it handled everything seamlessly.
Opening PowerShell with administrator privileges and entering the `wsl –install` command automatically installed `WSL` along with a default `Linux` distribution (for me, `Ubuntu`). Even setting `WSL2` as the default version after rebooting was handled by Claude Code without any fuss, leading to a successful and quick setup! It felt amazing to have my own mini Linux server within Windows. 🤩
4. The Magic of Containers: Docker Desktop Installation and Integration 🐳
With `WSL2` installed, it was time to install `Docker Desktop`, the core of my home server. `Docker Desktop` is a truly powerful tool that enables easy building and running of Linux-based containers on `Windows` via the `WSL2` backend.
I downloaded the `Docker Desktop for Windows` installer from the official `Docker` website and began the installation. During the process, I carefully ensured that the ”Use WSL 2 instead of Hyper-V” option was selected. After installation, I went to the `Resources > WSL Integration` tab in `Docker Desktop` settings and enabled integration with the `Ubuntu` distribution. Claude Code took care of all these steps automatically, so I simply had to observe.
Finally, when I opened the `Ubuntu` terminal and entered the `docker –version` and `docker run hello-world` commands, I felt a sense of accomplishment seeing the “Hello from Docker!” message. 🎉 Now, even complex server environments can be managed simply at the container level!
5. Conclusion: Taking the First Step in Building My Home Server 💖
Thus, starting with the SER9 MAX, I successfully took the first step in building my own home server by installing `Windows 11`, `WSL2`, and `Docker`. Throughout this entire process, Claude and Claude Code were like capable assistants, with Claude providing accurate information and Claude Code executing the commands, which was incredibly reassuring. I realized that even someone like me, who knows little about code or computers, can achieve this. 🤝
In the next installment, I plan to discuss how to deploy various home server services using `Docker Compose` on the environment built today, and how to configure network settings for secure external access. Please look forward to it! 😉
—