Even a Code-Illiterate Built It! Home Server Journey (8) — Zero Visitors — Fixing Search Visibility with Custom Domain and Cloudflare Tunnel

홈서버에서 .ts.net을 prsm-studio.com 커스텀 도메인으로 변경하는 과정

In Part 6, I set up WordPress. In Part 7, I completed automation with n8n. Blog — done. Automation — done. I was writing posts consistently. But here’s the thing.

I had virtually zero visitors.

To be precise, 5 total visitors over 2 weeks. 3 of them were bots (crawlers), and only 2 were real people — and they didn’t even come from search. They clicked a link from somewhere. Search my blog on Google? Nothing. Naver? Nothing. Only Daum showed results, but if you’re invisible on Google and Naver, you basically don’t exist.

The cause was embarrassingly simple.

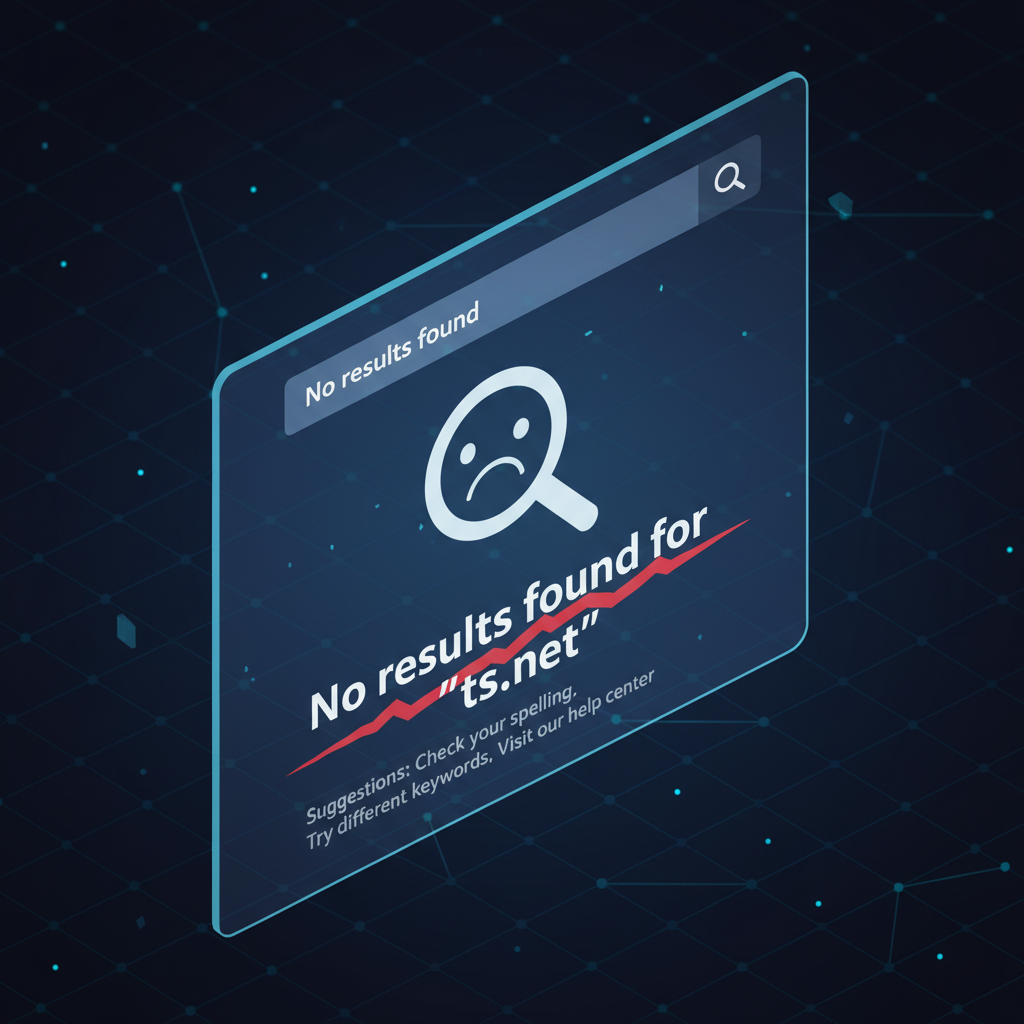
Tailscale Funnel’s Fatal Flaw: Google Ignores .ts.net Subdomains

.ts.net subdomain not indexed by search engines
Not a single Google search result for the .ts.net address

Remember setting up Tailscale Funnel in Part 2? It was magical — free public access to my server. The address was blog.dace-sidemirror.ts.net. It worked, SSL was automatic, everything was perfect.

But this address had a critical problem.

.ts.net is a subdomain owned by Tailscale. From Google’s perspective, this is just “a page on someone else’s platform.” It’s one of thousands of subdomains under Tailscale’s root domain. Google doesn’t prioritize indexing such subdomains because crawling thousands of subdomains under a single root domain would be a waste of resources. Tailscale’s own documentation states that Funnel is intended for “development and testing.”

site:ts.net  →  Google results: 0
site:blog.dace-sidemirror.ts.net  →  0

16 posts over 2 weeks, not a single one indexed by Google. No matter how good your content is, if search engines ignore your address, it’s meaningless.

Tailscale Funnel is excellent for development — internal testing, quick demos, webhook testing. But for a public-facing blog, it simply doesn’t work. A blog that doesn’t show up in search is not a blog.

Why a Home Server Blog Needs a Custom Domain

Custom domains aren’t just about SEO:

  • Brandingprsm-studio.com is memorable; blog.dace-sidemirror.ts.net is not
  • Credibility — A custom domain signals “this person is serious about their site”
  • Portability — Switch servers, switch hosts — your domain stays the same
  • Email — You can later create custom emails like [email protected]

The Solution: Custom Domain + Cloudflare Tunnel

I needed two things:

  1. My own domain — .com, .dev, whatever — an address I own
  2. A way to connect it to my server — without router port forwarding

Cloudflare solves both. Domain purchase on Cloudflare, tunnel on Cloudflare. And both are free (except the domain registration fee).

Tailscale Funnel Cloudflare Tunnel
Domain .ts.net (fixed) Custom domain
SEO ❌ Not indexed ✅ Normal indexing
SSL Auto Auto
Speed Normal Cloudflare CDN caching
Setup Very easy Easy (10 min)
Cost Free Free (domain ~$10-15/year)
Port forwarding Not needed Not needed

I kept Tailscale Funnel for internal services. Only the public blog moved to Cloudflare Tunnel. Both tunnels run simultaneously on the same server with no issues.

Step 1: Buy Domain on Cloudflare (5 min, $10.44)

Choosing the domain name took the longest. I wanted something related to a personal project, but all the good ones were taken. After searching around, prsm-studio.com felt right.

I purchased it directly on the Cloudflare dashboard. $10.44/year — less than a dollar per month. This is at-cost pricing (ICANN registration fee), cheaper than anywhere else. GoDaddy and Namecheap look cheap the first year but renewal prices jump 2-3x. Cloudflare charges at-cost, renewals included. They’ve publicly committed to never marking up domain prices.

Domain tip: .com is the safest choice. .dev and .io look cool but cost 2-3x more annually, and some users don’t trust non-.com addresses.

Step 2: Install Cloudflare Tunnel (10 min)

Secure tunnel between home server and Cloudflare
Cloudflare Tunnel: secure connection between server and Cloudflare

Cloudflare Tunnel creates a secure connection between my server and Cloudflare. No port forwarding needed. Similar to Tailscale Funnel, but the key difference: you use your own domain.

What I did: clicked ‘Create Tunnel’ on Cloudflare dashboard and passed the token to Claude Code. That’s it. Claude Code handled everything else.

# Command executed by Claude Code
sudo cloudflared service install [token from Cloudflare]

One command registers cloudflared as a system service that auto-connects on reboot. Claude Code also guided me through the tunnel routing setup:

  • Public hostname: prsm-studio.com
  • Service: http://localhost:8080 (WordPress port)

Now prsm-studio.com → Cloudflare Tunnel → my server’s WordPress. Auto SSL, auto CDN caching, and Cloudflare WAF for security — safer than raw port forwarding.

Step 3: WordPress URL Migration — I Just Watched

AI automatically replacing 636 WordPress URLs
AI replaced 636 URLs while the human just watched

Changing domains means updating every URL inside WordPress — image paths in posts, internal links, SEO metadata, RSS feed URLs. There’s way more than you’d expect.

What needed changing:

  • wp-config.php‘s WP_HOME and WP_SITEURL — core settings for WordPress’s self-awareness
  • All database URLs — image paths, internal links, metadata
  • Yoast SEO schema and OG tags — URLs shown in search results and social shares
  • robots.txt sitemap URL — path referenced by search crawlers
  • n8n workflow monitoring URLs — automation tool health checks

If I had to do this manually, it would take a week. I wouldn’t even know what to change. I told Claude Code: “Domain changed, handle the rest.” It found and replaced everything:

# Command executed by Claude Code
wp search-replace 'blog.dace-sidemirror.ts.net' 'prsm-studio.com' --all-tables
# Result: 636 replacements

636 items needed changing. Beyond database URLs, Claude Code also modified wp-config.php, cleared Yoast SEO cache, updated robots.txt, changed n8n workflow URLs via API, and updated the blog publishing script’s domain — all automatically. I just watched the terminal output scroll by.

There was a Cloudflare cache hiccup. After updating robots.txt, the old version kept appearing. Cloudflare was caching static files for 4 hours. Claude Code diagnosed the issue and set no-cache headers. All I did was click “Purge Everything” in the Cloudflare dashboard.

Step 4: 301 Redirect for the Old Address

In case anyone visits the old address (blog.dace-sidemirror.ts.net), they should auto-redirect to the new one. Claude Code added redirect rules to Apache’s .htaccess:

RewriteCond %{HTTP_HOST} blog\.dace-sidemirror\.ts\.net [NC]
RewriteRule ^(.*)$ https://prsm-studio.com/$1 [R=301,L]

301 means “permanent move.” It tells search engines: “This address has permanently moved to the new one.” From an SEO perspective, 301 redirects transfer the old address’s domain authority to the new one — essential for preserving any existing search equity.

Step 5: Search Engine Registration — I Clicked Buttons

Google Naver Bing Daum search engine registration
All 4 search engines registered

Time to tell search engines “I’m here!” Four registrations needed:

  • Google Search Console — Add property → DNS verification → Submit sitemap
  • Naver Search Advisor — Register site → HTML meta tag verification
  • Bing Webmaster Tools — Register site → URL submission
  • Daum Webmaster Tools — robots.txt verification code

Honestly, all I did was say “register these,” copy verification codes from each site, pass them to Claude Code, and click confirmation buttons. Inserting verification codes into WordPress, setting up Naver/Daum meta tags, updating robots.txt — Claude Code handled all of it.

Yoast SEO auto-generates the sitemap at prsm-studio.com/sitemap_index.xml. Submit this to search engines and they’ll crawl all listed URLs.

Claude Code also submitted 32 URLs via IndexNow — an instant indexing protocol supported by Bing, Yandex, and Naver. I didn’t even ask for this. It decided on its own that the new domain needed immediate search engine notification.

Result: Search Visibility Begins

Current status after domain change:

  • prsm-studio.com working
  • ✅ Google/Naver/Bing/Daum all registered
  • ✅ Sitemap submitted
  • ✅ 32 URLs submitted via IndexNow
  • ✅ Old address 301 redirects
  • ✅ Daum search confirmed (Daum was the only engine that indexed .ts.net)
  • ⏳ Google/Naver indexing pending (typically days to 2 weeks)

Fun fact: Daum indexed the .ts.net address all along — the only engine out of four. But Daum alone isn’t enough in Korea. Google and Naver are where the real traffic comes from. My n8n Blog Indexing Monitor checks indexing status every 12 hours and sends Telegram alerts.

Two lessons learned. First, free has its reasons. Tailscale Funnel is free and convenient, but it’s missing a fundamental blog feature: search visibility. $10.44/year completely solved that.

Second, AI really does handle everything. Here’s everything I personally did in this episode:

  • Bought domain on Cloudflare (entered credit card)
  • Clicked ‘Create Tunnel’ on Cloudflare dashboard
  • Copied verification codes from search engine sites + clicked confirm

wp-config modifications, 636 database URL replacements, .htaccess redirect rules, SEO meta tag insertion, n8n workflow updates, IndexNow batch submission, cache debugging — 100% of the technical work was done by Claude Code. A non-coder doing domain migration? In the AI era, it’s possible.

Next Episode Preview

Next up: automatic web meeting transcription + AI meeting minutes. Join Google Meet, Zoom, or Teams calls, automatically convert speech to text, and have AI organize key points and action items — a story about how meeting minutes are already done when the meeting ends.

Thanks for reading! Stay tuned for the next episode!

This post was also written by AI (Claude Code). The domain migration, this blog post — all done by AI. I just said “do it.”

Even a Code-Illiterate Built It! Home Server Journey (7) — Making the Server Work on Its Own with n8n

In the previous six episodes, I set up photo backup (Immich), an AI assistant (OpenClaw), local AI (Ollama), and a blog (WordPress) on my home server. Each service runs great on its own. But managing them all by hand? Honestly, it gets old fast.

“I just want to set it up once and have it run itself.”

That’s why I installed n8n. After setting up a few workflows, my server now works on its own. All I do is check Telegram notifications.

IT, 간판, 개념의 무료 스톡 사진
Photo by RealToughCandy.com / Pexels

What is n8n? One-Line Summary: Free Zapier

n8n (pronounced “n-eight-n”) is a visual automation tool. If you’ve used Zapier or Make (formerly Integromat), it’s exactly that. Drag blocks onto a canvas, connect them with lines, and your automation is done. Code? Not a single line needed.

The one difference: it runs on your own server. That means it’s free, there are no execution limits, and your data never leaves your machine.

Zapier n8n (Self-hosted)
Price From $19.99/month Free
Execution limit 100-750/month Unlimited
Your data Stored on Zapier’s servers Stays on your server
Integrations 7,000+ 400+ (all major services covered)
UI Very easy Easy (slight learning curve)

If you already have a home server, there’s no reason not to use n8n. Especially if you’ve ever hit Zapier’s free tier limit of 100 executions per month.

Installing n8n: One Docker Compose File

Remember how we set up Docker in Episode 1? We just add n8n on top of that.

services:
  n8n:
    image: n8nio/n8n:latest
    ports:
      - "5678:5678"
    volumes:
      - ./data:/home/node/.n8n
    environment:
      - N8N_BASIC_AUTH_ACTIVE=true
      - N8N_BASIC_AUTH_USER=admin
      - N8N_BASIC_AUTH_PASSWORD=yourpassword
    restart: unless-stopped

Tell Claude “install n8n” and it creates this file and runs docker compose up -d for you. Navigate to http://yourServerIP:5678 and you’ll see this:

CSS, HTML, IT의 무료 스톡 사진
Photo by Godfrey Atima / Pexels

At first glance it might look intimidating. But give it five minutes. You drag nodes (blocks) from the left panel onto the canvas and connect them with lines. It’s like building with LEGO.

Real Workflow #1 — Auto-Sync Dev Logs to Notion

I’m building an app called PRSM. (A non-coder building an app? Yep, I just tell AI what to do. That’s a story for another post.) Every day I write development progress in a file on GitHub. I wanted those logs copied to Notion automatically.

Doing it manually:

  1. Open GitHub
  2. Find today’s log file
  3. Copy the content
  4. Open Notion
  5. Paste into the Day Log page
  6. Add a date tag

Five minutes a day. Doesn’t sound like much, but that’s two and a half hours a month. And honestly, I forget to do it most days.

After automating with n8n:

Every night at 11 PM → Read file from GitHub → Auto-add to Notion Day Log

Three nodes. Set it up once, and it runs every night by itself. What I have to do: nothing. When I open Notion in the morning, last night’s log is neatly organized and waiting for me.

Real Workflow #2 — Auto-Monitor Blog Google Indexing

No matter how good your blog post is, if Google hasn’t indexed it, nobody can find it through search. This is especially brutal for new blogs — it’s common for posts to go unindexed for days after publishing.

Checking manually? You’d have to log into Google Search Console and inspect each URL one by one. Ten posts means ten checks.

n8n handles it:

Every 12 hours → Get list of published post URLs → Check Google indexing status → Unindexed post found? → Send Telegram alert

“Hey boss, episodes 3 and 5 still aren’t indexed on Google!” — I get alerts like this on Telegram. Then I just click “Request Indexing” in Search Console. Done.

Real Workflow #3 — Instant Alert When Server Goes Down

When you’re running multiple services on a home server, one of them can quietly die without you noticing. Once, Immich crashed after an update and I didn’t realize for over a day. That was a full day of photos not being backed up.

So I built this workflow:

Periodic check → Ping Immich → Ping OpenClaw → Ping WordPress → Any service down? → Send Telegram alert

Now when a service goes down, I get notified within minutes. After setting up this workflow, Immich actually crashed again. This time I caught it in 10 minutes and fixed it immediately. Because n8n is watching 24/7.

Real Workflow #4 — Morning Briefing Data Prep

Remember the morning briefing from Episode 5? My AI assistant sends me weather, news, gold prices, and my schedule via Telegram every morning at 7 AM.

To create that briefing, the AI needs data. Calling weather APIs, fetching exchange rates, checking the calendar — n8n handles all this data collection automatically at 6:50 AM every morning. At 7 AM, the AI picks up the data, summarizes it, and shoots it to Telegram.

My morning routine: Wake up, open Telegram, check today’s weather and news. That’s it.

Before and After Automation

Task Before After
Dev log Notion sync 5 min/day, often forgot Automatic (0 min)
Blog index check Manual search, too lazy so never did it Auto every 12h, just check alerts
Server status check Only knew when something broke Instant alert on failure
Morning briefing Manually search news Just check Telegram

Saving time is great, but the real benefit is peace of mind. “Is the server okay?”, “Did that post get indexed?”, “Did I sync the logs?” — I don’t worry about any of this anymore. n8n is watching over everything.

n8n Self-Hosting Cost Breakdown

Let’s crunch the numbers.

Item Using Zapier n8n Self-hosted
Monthly subscription $19.99 $0
Annual cost ~$240 $0
Extra electricity None Negligible (server already runs 24/7)

n8n is lightweight and barely uses any server resources. Compared to Immich or Ollama, it’s practically invisible. Since the server is already running around the clock, the additional electricity cost is effectively zero.

Tips for Beginners

It’s all great, but let me be honest about a few things to watch out for.

  • Name your workflows clearly. If you leave them as “My Workflow 1” and “New Workflow,” you won’t know what’s what once you have more than ten. Use specific names like “PRSM to Notion Sync” or “Server Health Check.”
  • Always add error notification nodes. When an API is temporarily down or a service changes, your workflow will fail silently. Connect a Telegram notification node at the end to catch errors — you’ll sleep better at night.
  • Block external access. n8n stores sensitive information like Notion tokens and GitHub tokens. Make sure to block external access with a firewall. I locked everything down with iptables back in Episode 1.

What’s Next

Now that the server runs itself with automation, it’s time to build features that are directly useful for real work.

In the next episode:

  • Auto-transcribe phone calls — hang up and the text is ready
  • AI-generated meeting notes — Google Meet and Zoom meetings summarized by AI
  • Whisper — OpenAI’s speech recognition AI, running free on your own server
  • How a single phone call becomes a work record in a manufacturing environment

A non-coder who built an AI assistant, now building an AI transcriber. Stay tuned.

This post was written by AI (Claude Code) and reviewed by a code-illiterate human.

Even a Code-Illiterate Built It! Home Server Journey (5) — OpenClaw: One Week Honest Review

선명한 노란색 배경에 골드 인증을 받은 고효율 850W 전원 공급 장치입니다.

OpenClaw Is Trending. So I Tried It.

AI agents are having a moment. Among them, an open-source AI agent framework called OpenClaw has been making waves in developer communities. “Run an AI secretary on your own server,” “command anything via Telegram” — that’s the pitch.

So I tried it. Installed OpenClaw on the home server from Episode 1, connected it to a Telegram bot, and used it for about a week.

The verdict?

“Revolutionary? No. But a few things are genuinely useful.”

# 실내, 기술, 기술 액세서리의 무료 스톡 사진
Photo by Mateusz Haberny / Pexels

What Is OpenClaw, Briefly

OpenClaw is an open-source AI agent platform. Install it on your server, and AI doesn’t just chat — it actually executes tasks. It reads files, calls external APIs, and runs jobs automatically on a schedule. The biggest difference from ChatGPT is this “agency” — the ability to act, not just answer.

It integrates with messengers like Telegram and Slack, and you can extend functionality through a plugin system called “skills.” You can freely swap AI models — Gemini, Claude, GPT, local LLMs, whatever you want.

Installation is one Docker command. But the actual skill development and setup… I’ll get to that.

Connecting Telegram — Meet “Jolgae”

After installing OpenClaw, you connect it to a Telegram bot. Create one through BotFather, drop the token into OpenClaw’s config, done. That part’s easy.

The important part is the name. What do you call your AI assistant? After some thought — “Jolgae” (졸개).

Jolgae is a Korean word meaning “underling” or “lackey” — the lowest-ranking errand boy in the Joseon Dynasty military. Someone who just does what they’re told, no questions asked. Think about what an AI agent actually is. It’s fundamentally “a thing that does stuff when you tell it to.” No need for grandiose names like “Jarvis” or “Alexa.” Let’s be honest. It’s a lackey.

“Jolgae, what’s the weather?” “Jolgae, translate this.” — it just feels natural. Not some grand AI assistant, just an errand boy I boss around. Took five seconds to name it, but surprisingly satisfying.

DeepSeek AI 대화 기능이 탑재된 AI 챗봇 인터페이스를 보여주는 스마트폰 화면의 클로즈업.
Photo by Matheus Bertelli / Pexels

Honestly, It Wasn’t Mind-Blowing

My expectations were high. “AI agent” sounds like science fiction. An AI secretary living on my server? Commands via Telegram?

But in practice… it’s not that different from texting ChatGPT. Ask a question, get an answer. Request a search, it searches. There were honest moments of “…is that it?”

The things developers rave about — the skill system architecture, model waterfall switching, API routing — technically elegant, sure. But as a regular user, “so what actually changes in my daily life?” matters more.

Opening the ChatGPT or Gemini app to ask a question versus texting Jolgae on Telegram — the difference isn’t dramatic. At least not at first.

But Then. Things Start Getting Convenient.

A few days in, I noticed something. “Hmm, I’d miss this if it were gone.”

It doesn’t dramatically change your life. But small conveniences stack up, and that stack gets surprisingly tall. Here are the features I found genuinely useful after a week.

1. Morning Briefing — No More Scrolling

Every morning at 7 AM, there’s a Telegram message waiting. Busan weather and air quality, exchange rates and gold prices, industry news I follow, AI tech trends, gaming news. Only topics I care about.

I used to open a news page on my commute and scroll through ads and clickbait until something interesting showed up. Now I don’t have to. AI reads the articles and sends 3-line summaries to Telegram. Two minutes on the subway and I’m caught up for the day.

Would I install OpenClaw just for this? That’s a stretch. But it’s the feature I use daily and enjoy most.

휴대폰에서 텔레그램 앱 사용하기
Photo by Viralyft / Pexels

2. Voice Transcription — This Actually Saves Money

This was the surprise killer feature. Google Meet, Zoom, Teams, Webex — send Jolgae a meeting link and a bot joins the call, records it, and converts everything to text.

Whisper (open-source speech recognition AI) runs on the server and converts speech to text. Jolgae then summarizes the result, separating key points, action items, and decisions. Results auto-save to Notion too. When the meeting ends, the minutes are waiting in Telegram.

Cloud transcription services like Otter.ai run $20-30/month. This setup? $0. Everything processes on my server.

One realistic caveat though. Whisper is hardware-hungry. Running local Whisper on my server (Ryzen 7, 32GB RAM) with CPU only, a 1-hour audio takes over an hour to transcribe. Yes, slower than real-time. You wait as long as the recording — or longer. An NVIDIA GPU with CUDA would make it 5-10x faster, but my server only has an AMD integrated GPU (Radeon 780M). AMD doesn’t support Vulkan acceleration for this, so the GPU just sits there unused. CPU-only it is. You need at least 16GB RAM for the medium-quality model, and 32GB for comfortable large-model usage. On an 8GB machine, it’s practically unusable.

So I also use OpenAI’s Whisper API. Cloud processing makes the speed noticeably better. Still not snappy, but a lot more bearable. Free local vs paid API — pick depending on the situation. I’ll cover this feature in more detail in the next episode.

3. Weekend Outing Planner — My Wife Likes This One

Friday at 6 PM, “Weekend outing recommendations!” arrives on Telegram. It checks weekend weather, picks three seasonal courses near Busan. Each comes with the address, drive time, kid-friendliness rating, parking info, estimated cost, and a rainy-day backup.

Honestly, the recommendation quality isn’t always great. Sometimes it suggests odd places, or recommends spots I’ve already visited. But the time spent wondering “what do we do this weekend?” shrinks. Bad suggestion? Don’t go. Good one? Just go.

Sharing “how about here?” with my wife turns into a conversation starter. That’s way better than staring at each other asking “so… what should we do?”

4. Auto Blog Publishing — 10 Minutes Per Post

This blog itself is proof. Give Jolgae a topic and it handles keyword research, writing, SEO meta tags, stock image insertion, and bilingual KO/EN publishing to WordPress. About 10 minutes per post.

Of course, AI-written content doesn’t go up unedited. There’s always something to fix. AI has never produced a 100% perfect post. But starting from a blank page versus starting from an 80% draft is night and day. I’ll dive deeper into the blog auto-publishing pipeline in the next episode.

cms, 공책, 구성의 무료 스톡 사진
Photo by Pixabay / Pexels

Things That Fell Short

An honest review means covering the downsides too.

  • For general chat, ChatGPT is just better. Faster responses, higher quality answers. Opening the ChatGPT app is often more convenient than texting Jolgae on Telegram.
  • Setting up skills isn’t easy. Officially, “no code needed.” In reality, you end up having AI write code for you. A non-developer adding new skills alone isn’t realistic.
  • It’s dumb sometimes. Misunderstands commands, sends wrong results, or errors out for no apparent reason. “AI agent” absolutely does not mean infallible.
  • Responses can be slow. Simple chat is fast, but tasks involving web search can take 30 seconds to a minute. Frustrating when you’re in a hurry.

ChatGPT vs OpenClaw — Side by Side

ChatGPT / Gemini App OpenClaw (Self-Hosted)
Chat Quality High Moderate (depends on model)
Response Speed Fast Moderate to slow
Scheduled Tasks (Cron) No Yes
Access Server Files No Yes
External API Integration Limited Unlimited
Telegram Integration No Built-in
Data Privacy Cloud-stored Your server only
Extensibility GPTs (limited) Skill system (unlimited)
Setup Difficulty None Docker required
Cost $20+/month API usage only

Bottom line: ChatGPT wins overwhelmingly on chat quality and speed. But if you need automation, scheduled execution, and server integration, OpenClaw can do things ChatGPT simply can’t. Different tools for different jobs.

So, Worth Installing?

OpenClaw is a good fit if you:

  • Already have a home server running Docker
  • Need daily, repetitive information gathering (news briefings, price monitoring)
  • Do frequent voice transcription (this genuinely saves cloud service fees)
  • Want everything unified through one Telegram bot

You can skip it if you:

  • Are happy with ChatGPT Plus or Gemini Advanced subscriptions
  • Don’t have repetitive tasks worth automating
  • Don’t have a server — phone only

It’s not a revolution. But once set up, daily conveniences quietly accumulate. Morning briefings, voice transcription, weekend recommendations — those three alone made the installation worthwhile for me.

가구, 기능성 가구, 기술의 무료 스톡 사진
Photo by Mateusz Haberny / Pexels

Technical Details (For the Curious)

My Jolgae (OpenClaw agent) configuration for reference:

Item Configuration
AI Models Gemini 2.5 Flash (primary) → Claude Haiku → GPT-4.1-mini → Ollama (local backup)
Installed Skills 32 (briefing, transcription, blog, planner, monitoring, etc.)
Automated Tasks 1 daily + 3 weekly + 2 monthly
Interface Telegram bot
Server Beelink SER9 MAX, AMD Ryzen 7, 32GB DDR5
Monthly Cost ~$4 electricity + API usage fees

OpenClaw installation itself is one Docker command. But skill development and detailed configuration? I had AI (Claude Code) do it for me. Honestly, a non-developer doing it alone is tough. But having AI do it for you counts as a valid approach. That’s how things work in 2026.

Currently Installed Skills (32)

Category Skill What It Does
Daily Automation morning-briefing Custom news briefing every morning
weekend-planner Weekend outing course recommendations
weekly-insight International trends weekly digest
Content blog-factory Auto blog writing + publishing
translate-blog Multilingual blog translation
image-gen AI image generation
Work Tools meeting-transcribe Voice file transcription + summary
ocr-bot Extract text from images
gold-briefing Business news briefing
Monitoring rate-monitor Telecom rate change detection
busan-culture Busan culture/experience program watch
power-monitor Server power monitoring
Knowledge Mgmt notion-rag Notion semantic search
local-rag Local file semantic search
second-brain Personal knowledge management
System system-heal Server self-healing
self-evolution Agent self-learning
Lifestyle food-recommend Restaurant recommendations
anniversary Anniversary reminders
Other +13 more n8n integration, decision helper, side hustle explorer, etc.

Of these, only about 5-6 make a noticeable daily difference. The rest are “nice to have.” But those 5-6 showing up in Telegram every morning — that’s the whole point.

Next Episode Preview

The blog auto-publishing I briefly mentioned in this episode — next time, I go deep. How AI publishes a blog post in 10 minutes — from keyword research to bilingual KO/EN publishing, all broken down from a non-developer’s perspective.

EP.6 — AI Writes My Blog? Building an Auto-Publishing Pipeline.

Even a Code-Illiterate Built It! Home Server Journey (4) — Running AI Locally with Ollama

e스포츠, pc 설정, rgb 조명의 무료 스톡 사진

Running AI on My Own Server?

ChatGPT, Gemini, Claude… everyone uses cloud AI. But have you ever thought:

“If I run AI on my own computer, it’s free AND my data stays private?”

That’s exactly right. Running a local LLM (Large Language Model) means no subscription fees and zero data leaving your machine. Perfect privacy.

But reality is… a bit different. I installed AI on my SER9 MAX mini PC from Episode 1, and the honest verdict? “It works. But it’s slow.”

DeepSeek AI 인터페이스를 보여주는 MacBook으로 디지털 혁신을 선보입니다.
Photo by Matheus Bertelli / Pexels

Ollama — The Local LLM Engine

Ollama is a tool that lets you run AI models on your own hardware. Sounds complicated? I had AI install it for me. A few terminal commands and done.

Once installed, one command — ollama run qwen3:14b — and the AI starts responding. The model downloads automatically, no configuration needed.

There are dozens of open-source models available: Llama, Qwen, Gemma, Mistral, DeepSeek… all free. Pick whichever fits your needs.

Open WebUI — ChatGPT Interface in Your Browser

Chatting in a terminal is honestly uncomfortable. So I installed Open WebUI — a program that gives you the exact same ChatGPT-like interface, running entirely on your server.

Again, AI handled the installation. One Docker container and it’s running.

The best part? My wife uses it too. Anyone on the same network can open a browser on their phone or tablet and start chatting. You can create separate accounts, so conversation history stays private for each person. With Tailscale from Episode 2, it’s accessible from anywhere.

DeepSeek 애플리케이션이 있는 대화형 AI 인터페이스를 보여주는 노트북 이미지.
Photo by Matheus Bertelli / Pexels

Specs vs. Reality — This Is What Matters

The most important question in local AI is “Can my hardware actually handle it?” Here are my real-world numbers.

My Server Specs

Component Specification
CPU AMD Ryzen 7 255 (8 cores, 16 threads)
RAM DDR5 32GB
GPU Integrated (AMD Radeon 780M) — effectively none
Storage NVMe SSD 1TB
OS Windows 11 + WSL2 (Linux)

Real Benchmarks (Qwen3 14B Model)

Metric Value
Generation Speed 5.5 tokens/sec
Simple Question Response ~25 seconds
RAM Usage ~10GB
Quantization Q4_K_M (9.3GB file)

What ChatGPT answers in 1 second takes my server 25 seconds. That’s roughly 5-10x slower in real usage. Watching characters appear one by one is… a patience test.

Why So Slow?

No dedicated GPU. AI inference is optimized for GPU computing, but my mini PC only has integrated graphics. I’ve confirmed that the AMD 780M iGPU can’t be used for AI acceleration under WSL2. Everything runs on CPU only — hence the speed.

With an NVIDIA GPU? The same model runs 5-10x faster. An RTX 4060 can push 30+ tokens/second. But you can’t put a discrete GPU in a mini PC — that’s desktop or gaming laptop territory.

RAM Determines Model Size

The most important spec for local AI is RAM. The entire model loads into memory.

RAM Model Size Quality
8GB 7B (7 billion parameters) Basic chat OK, struggles with complexity
16GB 14B (14 billion parameters) Decent conversation, handles general tasks
32GB 14B + headroom / can try 30B Comfortable 14B + other services running
64GB+ 70B (70 billion parameters) Approaching ChatGPT quality

7B vs 14B vs 70B — bigger means better. 7B handles simple chat but frequently hallucinates on complex questions. 14B is the minimum threshold where it feels “actually usable.” 70B jumps in quality but needs 40GB+ RAM.

That’s why I have 32GB. Running a 14B model while also keeping other Docker services (Immich, WordPress, n8n, etc.) alive requires the headroom.

선명한 노란색 표면의 T-Force Delta RGB DDR5 메모리 모듈.
Photo by Andrey Matveev / Pexels

So Is It Worth It?

Here’s my honest summary:

Worth it for:

  • Simple conversations, translation, summarization — slow but delivers results
  • Privacy-sensitive content — analyzing confidential work documents
  • Offline use — on a plane, in areas with no internet
  • Connecting AI to other apps — unlimited API calls, zero cost

Not worth it for:

  • Coding, complex analysis — cloud AI is overwhelmingly better
  • When you need fast responses — if you can’t wait 25 seconds
  • When you need current information — local models don’t know anything after their training date

The core value of local AI is “free” and “privacy.” If you’re expecting performance, you’ll be disappointed. But if those two things matter to you, it’s absolutely worthwhile.

Next Episode Preview

So far we’ve covered building the server, remote access, photo backup, and local AI. Next up is the piece that ties everything together — an AI agent and Telegram bot. Send a message on Telegram, and AI handles the rest. Building your own digital assistant.

EP.5 — AI Agent + Telegram: Putting a Secretary on Your Server. Stay tuned.

Even a Code-Illiterate Built It\! Home Server Journey (3) — Replacing Google Photos with Immich 📸🏠

gmail, google 포토, 가젯의 무료 스톡 사진

In Part 3, we set up a blog. Now it’s time for something actually useful.

Photo backup.

Google Photos: $2/month. iCloud: $1/month. Doesn’t sound like much, right? But what if you could do the same thing on your own server, for free, with unlimited storage?

Here’s the punchline: after setting up Immich on my home server, I cancelled my Google Photos subscription. Over 35,000 photos are now backed up automatically, and I can access them from anywhere thanks to Tailscale. What did I actually do? I told AI to set it up. That’s it.

Photo gallery on smartphone
Photo by Plann / Pexels

Why I Left Google Photos

Google Photos is great. AI search, automatic albums, the whole deal. But here’s the thing:

  1. 15GB free runs out fast. Take photos for three months and you’re done.
  2. Paid plans never end. 100GB, then 200GB, then 2TB… it’s a subscription for life.
  3. Your photos live on someone else’s server. What if Google changes their policy? What if they shut it down?

iCloud is the same story. I was paying for 50GB just for iPhone backup. Another monthly charge that never stops.

“I have a server at home. Why am I paying someone else to store my photos?” Once you think that, you’re already halfway there.

What Is Immich?

Immich is basically a self-hosted Google Photos.

  • 📱 Mobile app — automatic backup from Android and iOS
  • 🔍 AI search — search “beach” or “cat” and it just works
  • 🗺️ Map view — see where every photo was taken on a world map
  • 👥 Face recognition — automatically groups people
  • 📂 Albums — shared albums, timeline, everything
  • 🔒 Your server — data stays in your home

It does almost everything Google Photos does. It’s free, open-source, and the only storage limit is your hard drive.

클로즈업 사진에서 나무 표면 위의 핸드폰
Photo by Markus Winkler / Pexels

Installation: One Docker Compose File

Remember the Docker setup from Part 1? We just add on top of it.

# docker-compose.yml (essentials)
services:
  immich-server:
    image: ghcr.io/immich-app/immich-server:release
    ports:
      - "2283:2283"
    volumes:
      - ./upload:/usr/src/app/upload
    environment:
      - DB_PASSWORD=your_secure_password_here
      - REDIS_HOSTNAME=redis

  immich-machine-learning:
    image: ghcr.io/immich-app/immich-machine-learning:release

  redis:
    image: redis:7-alpine

  database:
    image: tensorchord/pgvecto-rs:pg16-v0.2.1

I told Claude “install Immich” and it created this file and ran docker compose up -d for me. I just watched.

Once it’s running, go to http://server-ip:2283, create an admin account, and you’re ready.

Auto-Backup from Your Phone

  1. Install Immich from Play Store (or App Store for iPhone)
  2. Enter your server address: http://192.168.xxx.xxx:2283

    – Want access outside your home? Use your Tailscale IP (see Part 2!)

  3. Log in → Enable auto backup
  4. Done.

That’s literally it. Every photo you take now automatically goes to your home server.

I uploaded over 35,000 photos from my Galaxy S25 Ultra. How long did it take? About 3-4 days. But honestly, I didn’t even notice. I installed the app, turned on backup, and just lived my life. Went to work, ate, slept — and a few days later I opened the app and everything was there. That’s the beauty of it. Set it and forget it.

Cloud backup and storage
Photo by Alpha En / Pexels

iPhone Users: You’re Covered Too

Same exact process:

  1. Install Immich from App Store
  2. Enter server address + log in
  3. Auto backup ON

For existing photos stuck in iCloud:

  1. Mac Photos app → Settings → “Download Originals to this Mac”
  2. Wait for everything to download (could be dozens of GB)
  3. Use immich-go to bulk upload to your server

Google Photos works the same way. Export via Google Takeout → upload with immich-go. Duplicates are automatically filtered out. Even if the same photo exists in both Google and iCloud, only one copy ends up on your server.

Access Your Photos From Anywhere

Remember the Tailscale setup from Part 2? This is where it pays off.

Set your Immich app’s server address to your Tailscale IP (100.xx.xx.xx:2283), and you can access your photos from a cafe, from a business trip, from another country. It’s a VPN, so security isn’t a concern either.

AI Features: No Reason to Miss Google Photos

Immich comes with a built-in Machine Learning server. It runs automatically after installation.

Photo Search

Type “food” in the search bar and only food photos show up. “Beach”, “mountain”, “car” — it all works. Same AI search as Google Photos, but running on your own server.

Face Recognition

It automatically detects and groups faces. Tag someone’s name once, and you can browse all their photos in one place.

Map View

Photos with GPS data appear as pins on a world map. Perfect for “where did I take that photo last year?”

How Much Do You Actually Save?

Let’s do the math.

Service Monthly Yearly
Google Photos 100GB $2 $24
iCloud 50GB $1 $12
Total $3 $36
Immich (self-hosted) $0 $0

What about electricity? The SER9 MAX has a 54W TDP. Running 24/7 costs roughly $1.50/month in electricity. But that’s shared across all services — blog, AI assistant, local LLM, and more. The photo backup cost is effectively zero.

As long as you have hard drive space, it’s unlimited backup. Add a 1TB SSD and you’re set for a decade.

The Honest Downsides

Let’s be real about the cons:

  1. Server down = no access. During power outages or reboots, you can’t reach your photos. The app does cache recent ones for offline viewing though.
  2. You need backup for your backup. If your SSD dies, your photos are gone. External drive or NAS for redundancy is strongly recommended.
  3. Initial upload takes time. 35,000 photos took 3-4 days for me. But it runs in the background — just forget about it and check back later. One day you’ll open the app and it’s all done.
  4. Shared albums are limited. The “share a link with anyone” feature isn’t as polished as Google Photos yet.

But if you believe “my photos should stay on my server”, these trade-offs are worth it.

What’s Next

Photos backed up on our server. Blog is live. Remote access works. Now it’s time to give this server a brain.

In the next part:

  • OpenClaw + Telegram — putting an AI assistant on the server and chatting with it via Telegram
  • A morning briefing bot that sends weather, news, and schedule summaries every day
  • An AI that writes blog posts, generates images, and even codes — my personal AI minion

Stay tuned for the story of how a guy who can’t write a single line of code built his own AI assistant.

This post was written by AI (Claude Code) and reviewed by a code-illiterate human. 🤖✨

[Computer Play] Even a Code-Illiterate Built It! My Home Server Journey (1) – Starting with SER9 MAX, Windows 11, WSL2, and Docker 💻🚀 (feat. Claude & Claude Code)

선명한 노란색 배경에 골드 인증을 받은 고효율 850W 전원 공급 장치입니다.

[Computer Play] Even a Code-Illiterate Built It! My Home Server Journey (1) – Starting with SER9 MAX, Windows 11, WSL2, and Docker 💻🚀 (feat. Claude & Claude Code)

Hello, I’m Toaster! 🙋‍♂️ Today, I’d like to share the first story of an exciting project I embarked on: building my own home server. To be honest, I’m completely illiterate when it comes to code or computers. Yet, driven by growing costs of cloud services and concerns about my data sovereignty, I decided to create ‘my own playground.’ The journey began with a mini PC, the Beelink SER9 MAX. A special highlight is that this entire journey started with Claude, and the installation process was seamlessly handled by Claude Code!

1. Why Did I Want to Build a Home Server? And Why SER9 MAX? ✨

Initially, I used cloud servers. However, as time went on, the monthly costs became a burden, and I felt a vague unease about my precious data being stored somewhere else. So, I decided to ‘manage a server directly with my own hands.’ I dreamed of a digital playground operated in my own space, under my own rules. 🏰

I spent a lot of time considering which hardware to choose for building a home server. After comparing several mini PCs, the Beelink SER9 MAX caught my eye. 10 Gigabit Ethernet, dual M.2 NVMe slots, DDR5 memory, and an efficient AMD Ryzen 7 H255 processor! It boasted incredible specs for its small size. I vividly remember the excitement of ordering it from Amazon and waiting for its arrival. 📦 Throughout this entire process of exploration and decision-making, Claude provided invaluable assistance with various information searches and comparative analyses.

2. Is Windows 11 Suitable as a Home Server OS? 🤔

When I received the SER9 MAX, I found that Windows 11 was pre-installed. Typically, when people think of a home server, Linux often comes to mind, but I’m familiar with the Windows environment, and installing a new Linux server OS right away seemed cumbersome. So, I decided to use Windows 11 as is.

The advantages were clear. The familiar UI/UX made initial setup incredibly convenient, and its compatibility with various Windows software was excellent. For purposes like a media server or simple file sharing, it was quite appealing. However, there were also clear drawbacks. Compared to Linux-based server operating systems, Windows generally consumes more system resources like CPU and RAM, meaning that 24/7 stable operation requires more attention. The absence of advanced features like Remote Desktop Server and Hyper-V in Windows 11 Home was also a downside.

3. A Small Linux World Within Windows: My WSL2 Installation Journey 🐧

I learned that `WSL2 (Windows Subsystem for Linux 2)` was essential for installing `Docker` on my home server. This is because `Docker Desktop` uses the `WSL2` backend to run Linux-based containers on Windows. At first, I was worried it might be complicated, but I entrusted the installation to Claude Code, and it handled everything seamlessly.

Opening PowerShell with administrator privileges and entering the `wsl –install` command automatically installed `WSL` along with a default `Linux` distribution (for me, `Ubuntu`). Even setting `WSL2` as the default version after rebooting was handled by Claude Code without any fuss, leading to a successful and quick setup! It felt amazing to have my own mini Linux server within Windows. 🤩

4. The Magic of Containers: Docker Desktop Installation and Integration 🐳

With `WSL2` installed, it was time to install `Docker Desktop`, the core of my home server. `Docker Desktop` is a truly powerful tool that enables easy building and running of Linux-based containers on `Windows` via the `WSL2` backend.

I downloaded the `Docker Desktop for Windows` installer from the official `Docker` website and began the installation. During the process, I carefully ensured that the ”Use WSL 2 instead of Hyper-V” option was selected. After installation, I went to the `Resources > WSL Integration` tab in `Docker Desktop` settings and enabled integration with the `Ubuntu` distribution. Claude Code took care of all these steps automatically, so I simply had to observe.

Finally, when I opened the `Ubuntu` terminal and entered the `docker –version` and `docker run hello-world` commands, I felt a sense of accomplishment seeing the “Hello from Docker!” message. 🎉 Now, even complex server environments can be managed simply at the container level!

5. Conclusion: Taking the First Step in Building My Home Server 💖

Thus, starting with the SER9 MAX, I successfully took the first step in building my own home server by installing `Windows 11`, `WSL2`, and `Docker`. Throughout this entire process, Claude and Claude Code were like capable assistants, with Claude providing accurate information and Claude Code executing the commands, which was incredibly reassuring. I realized that even someone like me, who knows little about code or computers, can achieve this. 🤝

In the next installment, I plan to discuss how to deploy various home server services using `Docker Compose` on the environment built today, and how to configure network settings for secure external access. Please look forward to it! 😉